Data

1. Data Gathering
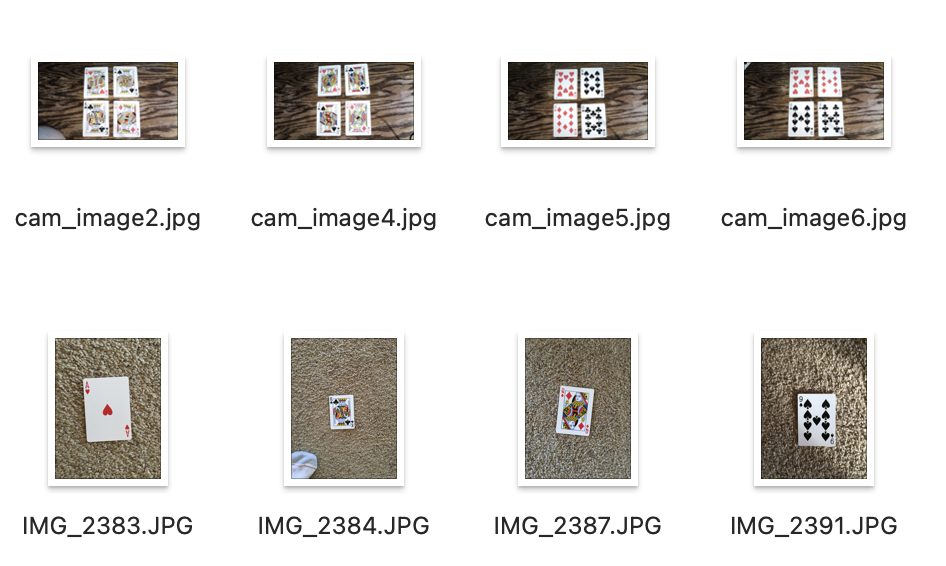
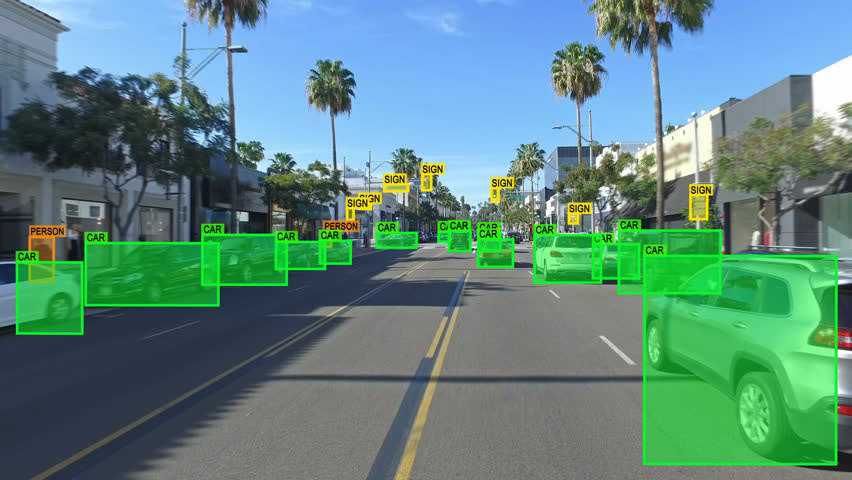
To develop any computer vision application, the first thing the project needs to collect is data, and in this case, pictures. It's important to gather lots of images of playing cards with various backgrounds, sharpness, quality, colors, and several orientation and alignments, since this helps computer understand all kinds of cards. The basic difference between the data in two stages is, images for stage 1 contains just one card for a classification task, whereas for stage 2, images contains 2, 3 or more cards for object detection purpose.
Stage 1: Starting with a basic approach, a single image of every card in a standard 52-card deck was captured using iPhone 14 Pro. Additionally, images sourced from internet were included into the dataset. Using data augmentation techniques, multiple variations/iterations of each image were generated.
Stage 2: An open-sourced dataset from Kaggle platform was used to collect diverse playing card images. Credits to the author:
https://www.kaggle.com/datasets/andy8744/playing-cards-object-detection-dataset/data
2. Data Cleaning
Stage 1: No cleaning was required.
Stage 2: Some of the images present in the raw data collected for stage 2 were of poor quality such as extremely blurred, distorted, and, misaligned. These images were removed. Post removal, there were 355 images of playing cards. To make things better and more interesting, some more pictures were added using a regular deck of playing cards. The deck had 52 cards with easy-to-see symbols and letters, accumulating into a total of 363 images overall.
3. Data Preprocessing & Annotation
After collecting images of playing cards, the next thing to do was to label them. Labeling means marking important parts in the pictures. Image annotation is different from labelling a record dataset for instance. Since image data is composed of pixel information, there is a need to locate parts of these pixels which are important or contain information, and log their coordinates.
One way to do this is by using Bounding Box Annotation Mechanism. It's like drawing a box around the important stuff, specifying four corners of the rectangular box in terms of four coordinates - top, right, left and bottom in pixel dimensional space. Several tools exist online that can help us achieve creating bounding boxes over uploaded images such as:
Labelmg (https://github.com/HumanSignal/labelImg)
Make Sense AI (https://www.makesense.ai/)
v7 Labs (https://www.v7labs.com/)
RoboFlow (https://docs.roboflow.com/annotate/annotation-tools)
Stage 1:
Original Images collected were each 16 Megapixels and high resolution, which would have consumed a lot of computing. Hence all the images were rescaled to a lower resolution of 224 x 224 pixels in a R,G,B color scheme. Also, all the image arrays were normalized (divided by 255.0) to have all the pixel densities between 0-1. All the images with equal representation were then splitted into train, validation and test sets, and distributed uniformly in a 80:20 ratio.
Stage 2:
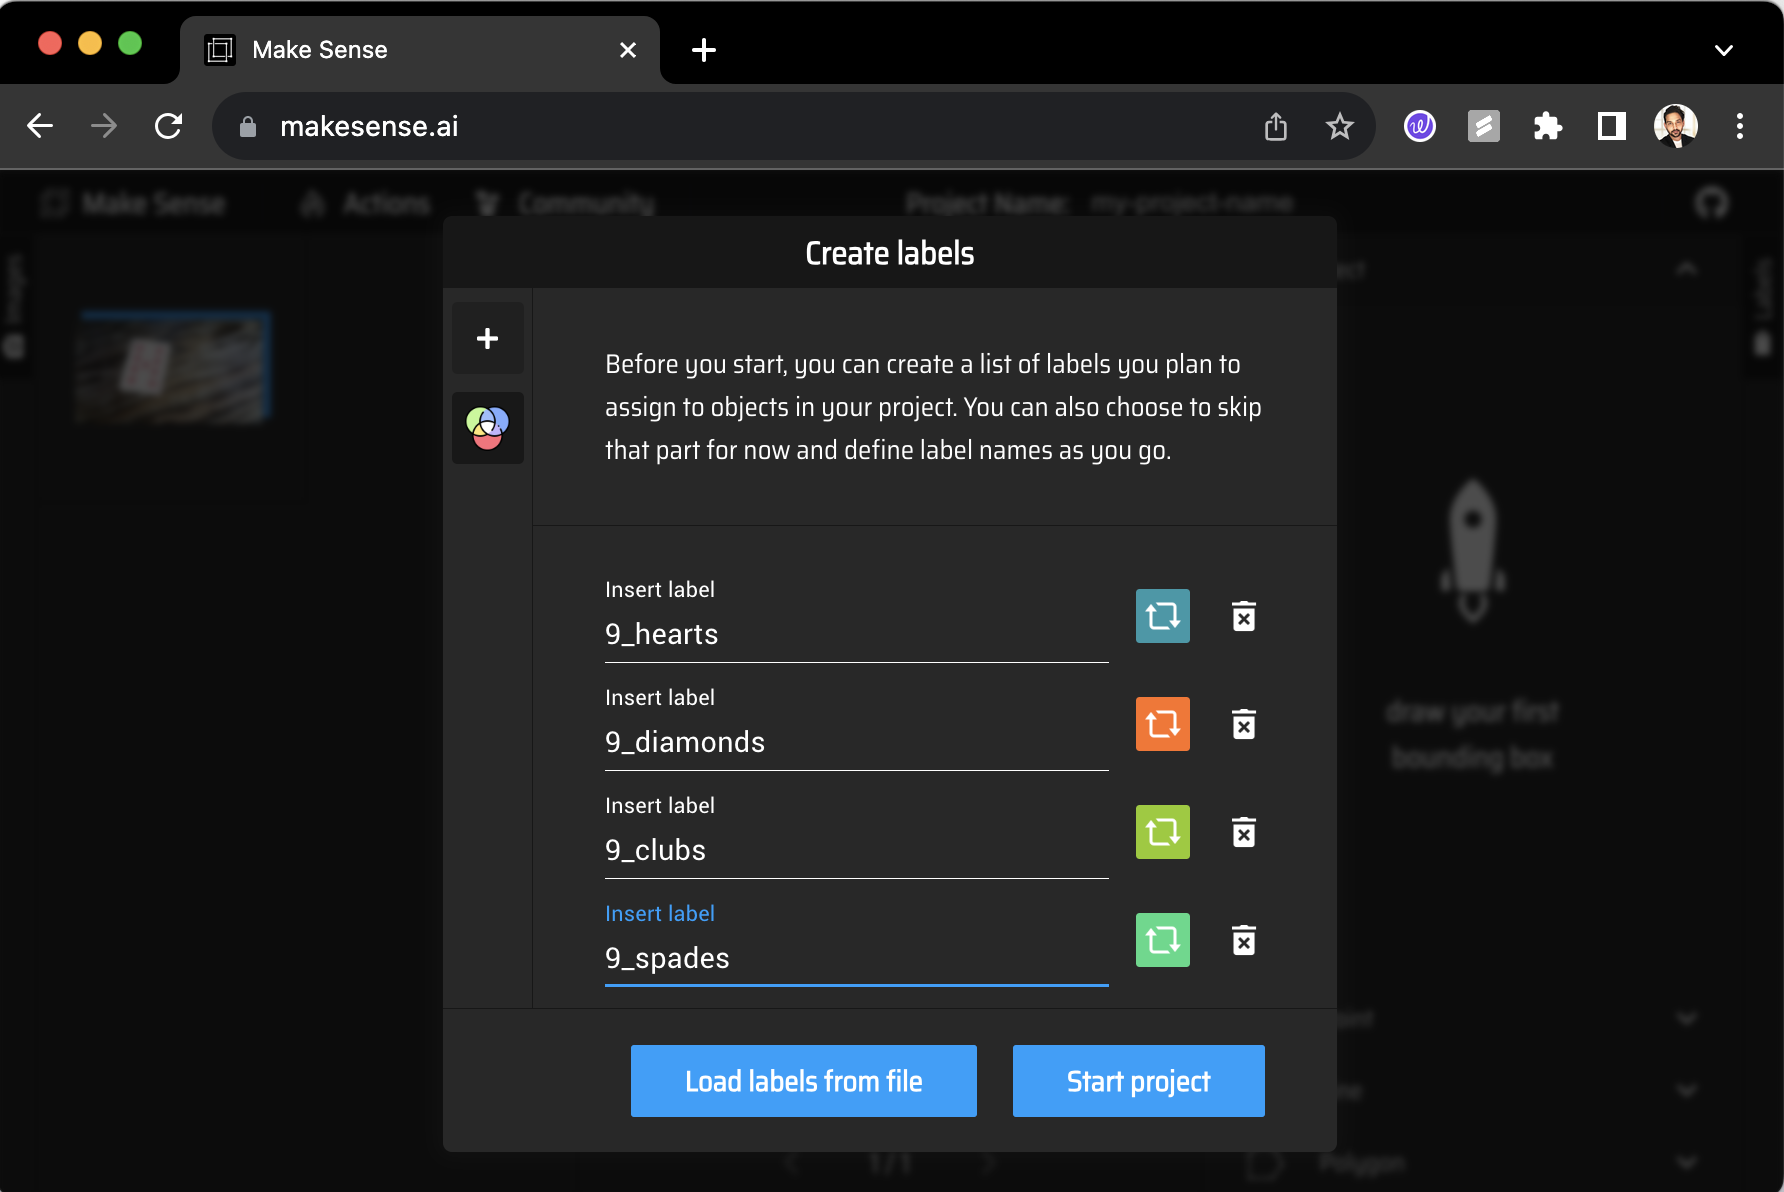
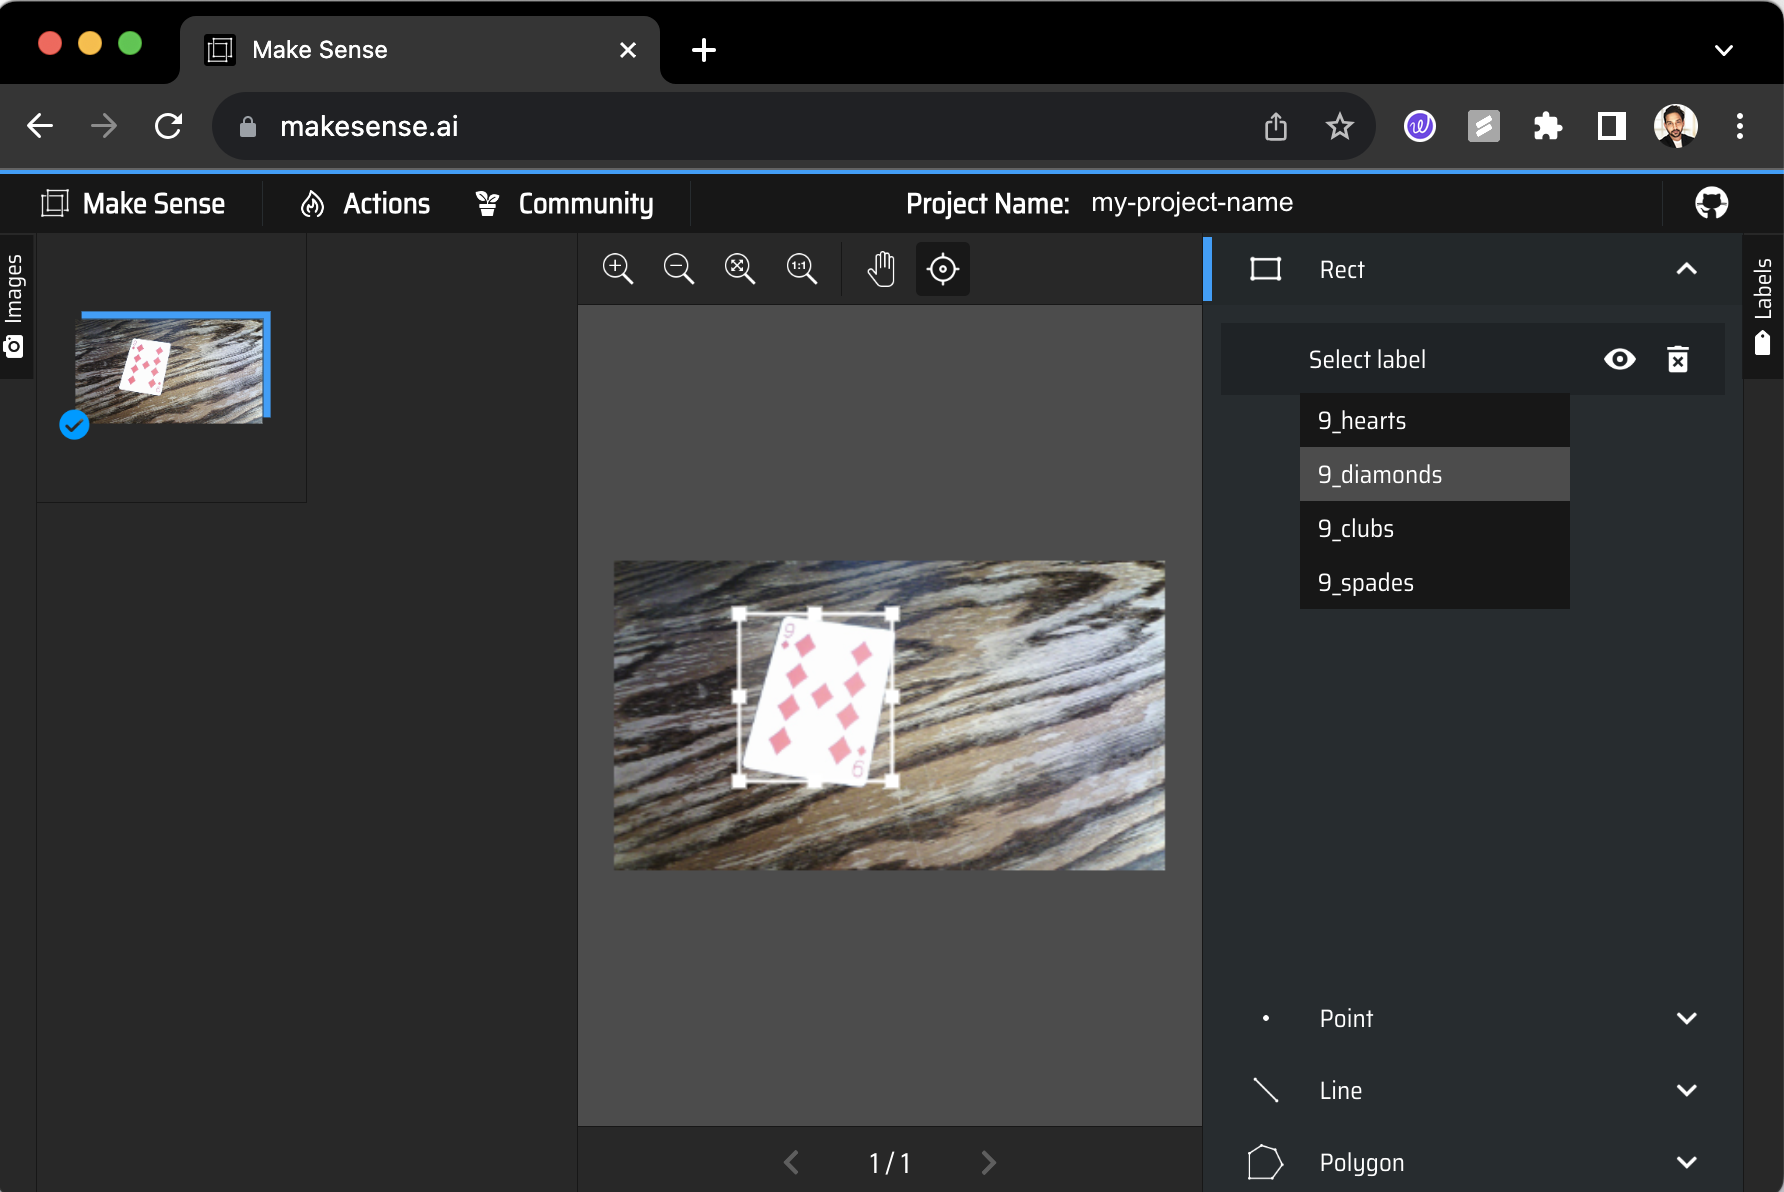
Some of the images required annotation, and MakeSense.ai was used for the annotation task. Here are some of the steps to annotate any image data:
Upload your dataset images by selecting Get Started
Select Object Detection
Add the number of labels you wish to classify and hit New Project.
Start annotating each image by using Rect (rectangular bounding box) and selecting the apt label from the right-hand side dropdown menu.
Once all the images are annotated, hit the Actions tab and select Export Annotations and select .zip file in YOLO format.
Next, in your local machine, create a parent-folder called data
Create two sub-folders: images and labels
Each of the sub-folder would have two more sub-folders: train and test
Unzip the downloaded annotated images from makesense.ai website.
It should have .txt files containing annotations in format:
[ "label", "coordinate1", "coordinate2", "coordinate3", "coordinate4" ]
Select randomly some images and their corresponding annotated .txt files,, this will be your training data.
Place the images under /data/train/images and corresponding annotated files under /data/train/labels
Repeat this using the remaining files and placing them under /data/test/* sub-folder.
Once annotated, and exported, all images and their corresponding bounding box coordinates were stored in .txt formatted files.

4. Final Labels
Stage 1:
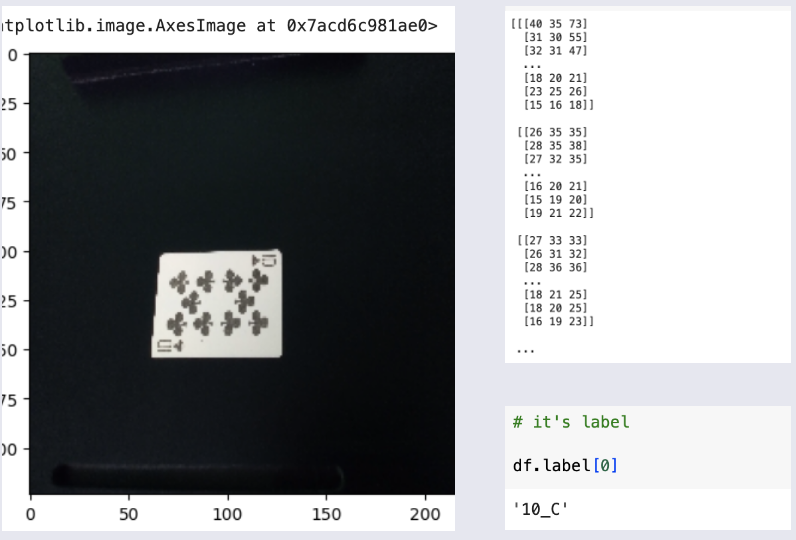
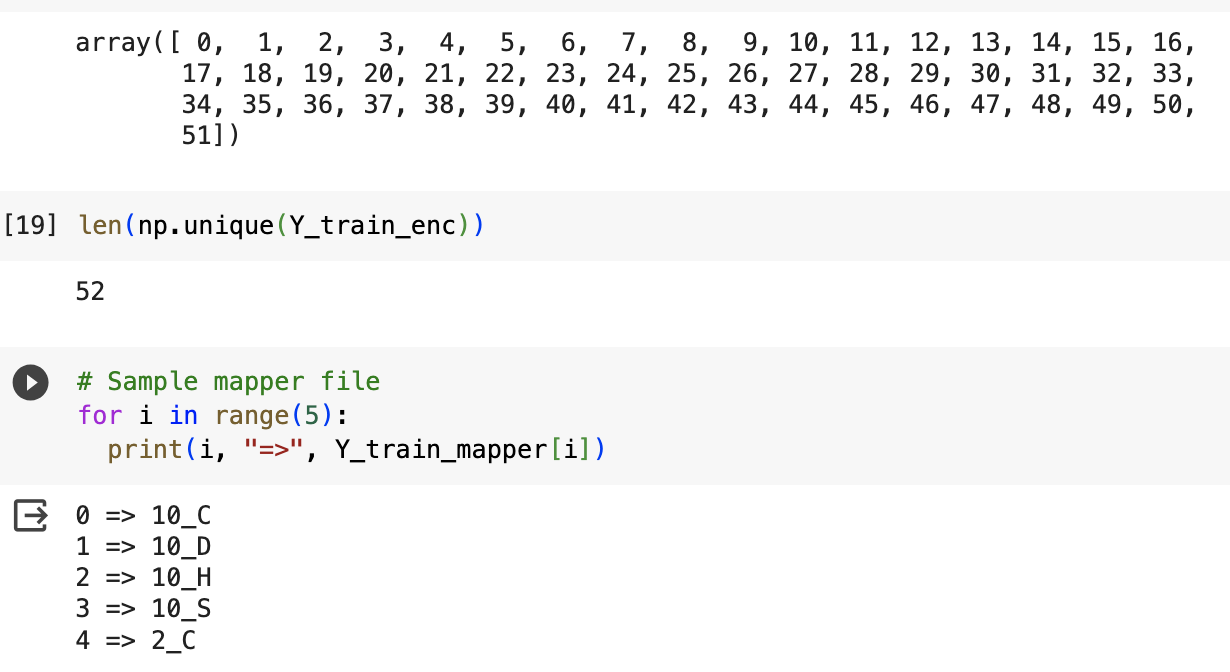
Initially the data had 52 labels, such as "10_H" which meant Hearts of 10, "A_S" meant Ace of Spades, likewise. These 52 labels were integer-encoded into 0 to 51. For instance, "10_H" became '0', and likewise, "A_S" became '1' label. That's it to image classification model data preparation.
Stage 2:
For object detection, the labels were little more complicated. Instead of a singular value these labels represented coordinates in a bounding box coordinate system. For each image, containing one or multiple cards, they would be annotated and produced in a label file in .txt format.
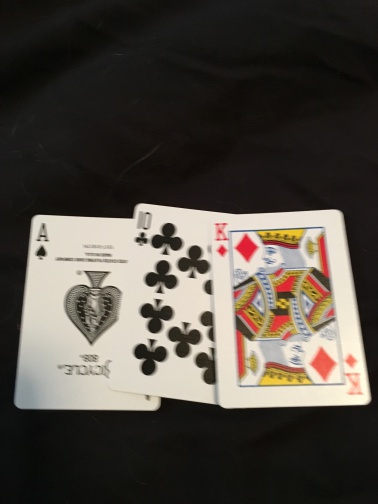
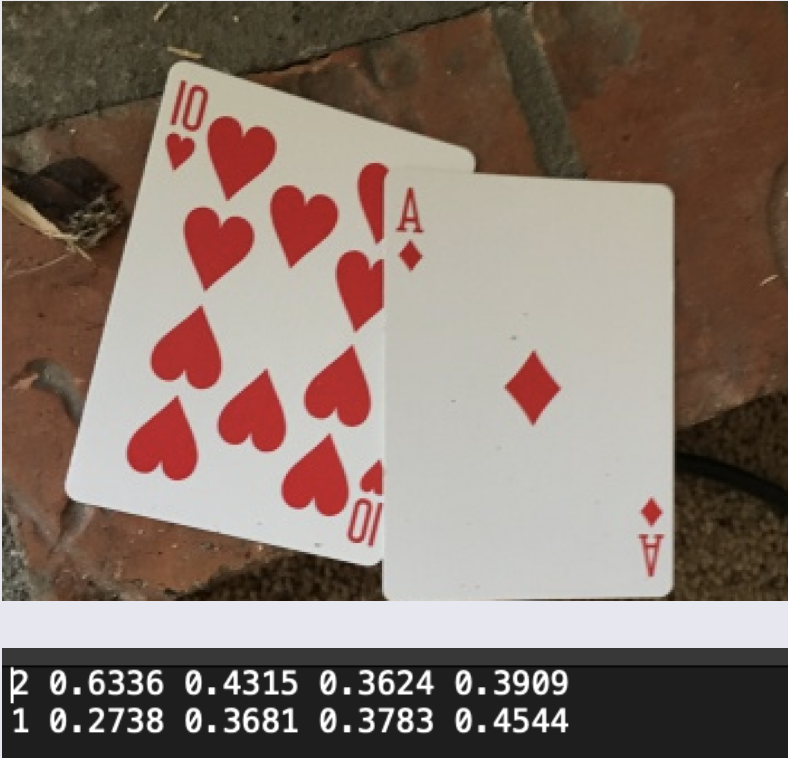
For example, let's have a look at he image of a "Hearts of 10" and a "Diamonds of Ace" alongside.
In a real scenario, there would always be two files for each datapoint: a raw image file, and its annotation .txt file.
The above image is the actual raw image found in data.
This was annotated using the following format in YOLO-label:
[ "label", "coordinate1", "coordinate2", "coordinate3", "coordinate4" ]
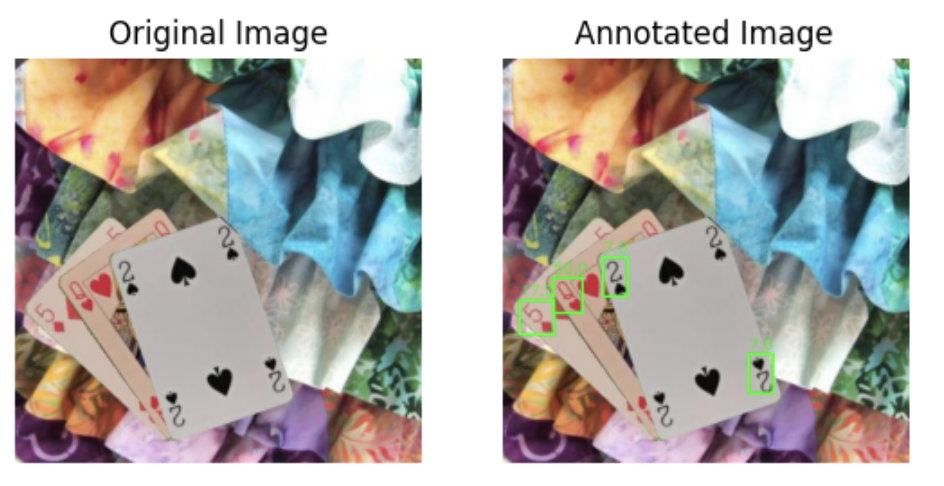
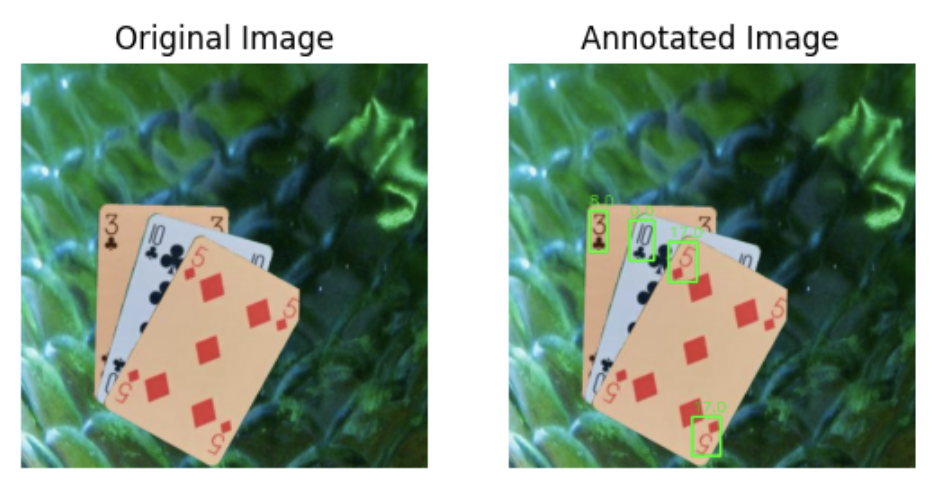
Thus, the label of this image is contained in the two lines of information: These lines represent the label and bounding-box coordinates which presumably capture the two cards.
Using the information from these two lines, a virtual bounding box can be drawn using Python. This has been depicted in the two red boxes, this information itself is the image label, and shall be learned by the model.
Hence,
above image: actual file available in the training data images folder.
middle image: actual annotated information for the image
bottom image: if labels are visualized using a Python code